Custom Field Creation
This guide explains how to create, configure, and manage Custom Fields in WhatsCloud SaaS. These fields allow you to collect personalized data through contact creation forms and can be edited or reused as needed, ensuring your contact database is tailored precisely to your business requirements.
Overview
Custom Fields enhance contact management by letting you add custom attributes like "Company Name", "Customer Type", or "Referral Source." These fields can be:
- Shown in contact creation and editing forms.
- Marked as required to enforce data collection.
- Displayed as columns in contact tables for quick overview.
How to Create a Custom Field
- Navigate to: Setup > Custom Fields > Create Custom Field
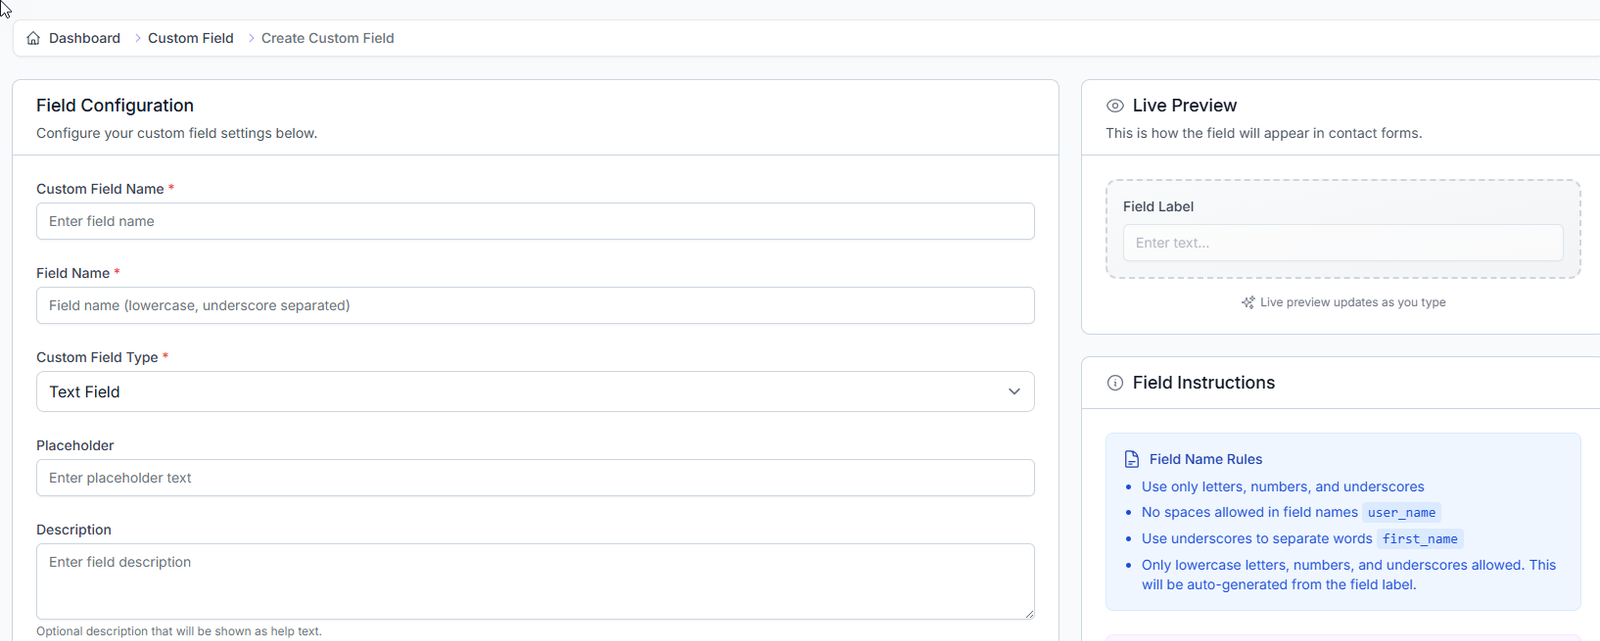
- Fill out the Field Configuration form:
| Field | Description |
|---|---|
| Custom Field Name | The primary label shown to users in the contact form (e.g., Company Name). |
| Field Name | Used internally by the system; must be lowercase with underscores (e.g., company_name). |
| Custom Field Type | Choose the type of input (text, number, dropdown, etc.). |
| Placeholder | Optional hint text shown inside the input box to guide the user. |
| Description | Optional help text displayed under the field in the form for clarity. |
Field Instructions
These are the rules for the internal Field Name:
- Use only letters, numbers, and underscores (
_). - No spaces allowed in field names (use
user_name, notuser name). - Use underscores to separate words (e.g.,
first_name). - Only lowercase letters, numbers, and underscores are permitted.
🧠 In many cases, the system will **auto-generate** a compliant internal Field Name from the Custom Field Name you enter.
Field Types
| Type | Description |
|---|---|
| Text Field | Single line of text, perfect for names, titles, or short answers. |
| Text Area | Multiple lines of text, ideal for detailed notes, descriptions, or longer content. |
| Number | Numeric values only, great for age, quantity, or measurements. |
| Date | Provides a date picker for birth dates, schedules, or deadlines. |
| Dropdown | Allows selection from predefined options, perfect for categorization or fixed lists. |
| Checkbox | A simple Yes/No or True/False selection, ideal for agreements or boolean options. |
Additional Settings
| Option | Description |
|---|---|
| Default Value | A pre-filled value shown when creating new contacts, which can be overridden. |
| Required | If checked, this field becomes mandatory for saving new or edited contacts. |
| Active | Only active fields are shown in contact forms and are usable across the app. |
| Show in Contact Table | Displays this field as a dedicated column in the main contacts list/table. |
Live Preview
As you configure the field, a dedicated Live Preview panel (usually on the right side of the creation screen) shows exactly how your custom field will appear in the contact form.
The preview updates automatically as you make changes to the label, description, or placeholder, allowing for instant design feedback.
Save or Cancel
- Click Save to finalize and activate the custom field.
- Click Cancel to discard changes and close the creation form.
Once fields are created:
- They will immediately appear in the contact creation/edit forms.
- They can be edited or deleted from the Custom Fields list view.
- Changes will reflect immediately across the WhatsCloud application (provided the field is active).
Viewing Custom Fields
After creation, all your custom fields will be listed on the Custom Field management page.
Navigation
Setup > Custom Fields
Custom Field List View
This section displays all previously created custom fields in a structured table format.
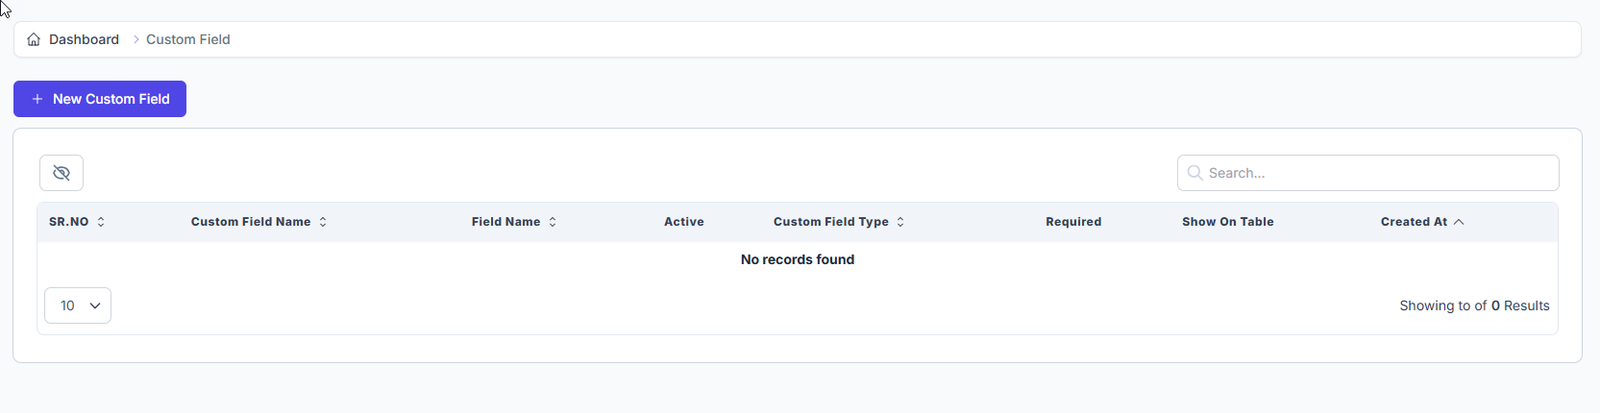
Table Columns Explained
| Column | Description |
|---|---|
| SR. NO | Serial number for easy reference. |
| Custom Field Name | The display name used on the contact form. |
| Field Name | The internal field identifier (lowercase, underscore format). |
| Active | Indicates if the field is currently active and usable in forms (Yes/No). |
| Custom Field Type | Shows the type of field (e.g., Text Field, Date, Dropdown). |
| Required | Displays whether this field is mandatory when adding/editing contacts (Yes/No). |
| Show on Table | Indicates whether this field is visible as a column in the contact list/table (Yes/No). |
| Created At | Timestamp showing when the field was created. |
🗒️ Note: When no custom fields are created, the message
"No records found"will be displayed in the table.
Search & Pagination
- Search Bar: Located on the top-right of the table, this allows you to filter custom fields by name or type.
- Pagination Dropdown: At the bottom-left, use this to change how many results are displayed per page (e.g., 10, 25, 50).
Editing a Custom Field
To edit an existing custom field:
- Go to
Setup > Custom Fields. - Click the Edit icon next to the desired field in the list.
- Update the settings and click Save.
⚠️ Caution: Once created, some critical options (like Field Type or internal Field Name) may be locked to prevent data corruption in existing contacts.
Example: Creating a "Company Name" Field
| Setting | Value |
|---|---|
| Custom Field Name | Company Name |
| Field Name | company_name |
| Field Type | Text Field |
| Placeholder | Enter the client's company name |
| Description | Optional: Enter the full, legal company name. |
| Default Value | - |
| Required | ✅ (Yes) |
| Active | ✅ (Yes) |
| Show in Contact Table | ✅ (Yes) |