Pusher
WhatsCloud uses Pusher to power its real-time event broadcasting system. This integration enables instant notifications, live updates, and desktop alerts across the platform — ensuring users stay informed and engaged with minimal delay.
How to Set Up Pusher in WhatsCloud
Follow the steps below to integrate Pusher with your WhatsCloud instance:
- Sign up or log in to your Pusher account.
- From the Pusher dashboard, create a new app.
- Copy the following credentials from your Pusher app:
- App ID
- App Key
- App Secret
- Cluster
- In WhatsCloud, go to:
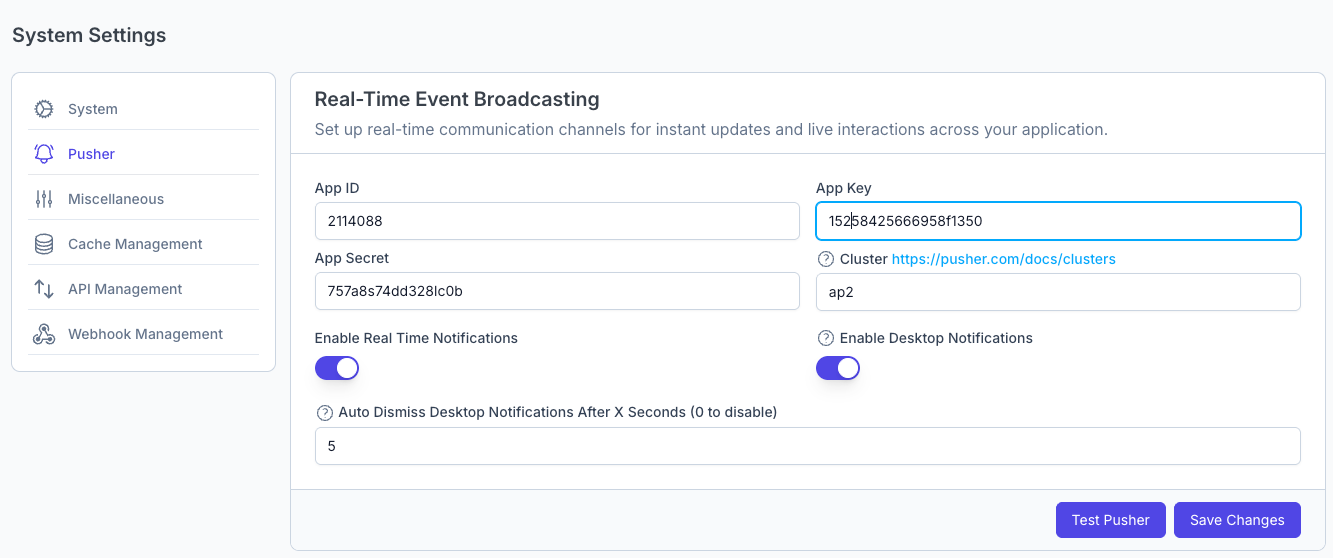
System Settings > Pusher > Real-Time Event Broadcasting. - Paste the credentials into their respective fields:
- App ID:
2114088 - App Key:
15258425666958f1350 - App Secret:
757a8s74dd328lc0b - Cluster:
ap2
- App ID:
- Enable the following features by toggling the switches:
- ✅ Real-Time Notifications
- ✅ Desktop Notifications (optional)
- Set Auto Dismiss Time (in seconds) for desktop notifications.
- Set
0to disable auto-dismiss.
- Set
- Click Test Pusher to validate the connection.
- Click Save Changes to activate the integration.
Configuration Fields
| Field | Description |
|---|---|
| App ID | Unique identifier for your Pusher application. |
| App Key | Public key used by WhatsCloud’s frontend to authenticate with Pusher. |
| App Secret | Private key used by WhatsCloud’s backend for secure communication. |
| Cluster | Server region (e.g., ap2 for Asia-Pacific). View options. |
| Enable Real-Time Notifications | Sends instant updates (e.g., new messages, task changes). |
| Enable Desktop Notifications | Triggers browser-based push notifications for end users. |
| Auto Dismiss Notifications | Controls how long desktop alerts remain visible (in seconds). |
Cluster Selection
Selecting the appropriate Cluster is critical for latency and performance. Use a cluster close to your user base. For example:
ap2– Asia-Pacificus2– United Stateseu– Europe
See the full list in the Pusher Cluster Guide.
Final Steps
After completing the setup:
- ✅ Use Test Pusher to verify connectivity.
- ✅ Click Save Changes to apply and enable real-time updates.