🛍️ WooCommerce Webhook Setup
Complete guide to configure WooCommerce webhooks for seamless integration with the Ecommerce Webhook Notifications Addon in WhatsCloud.
What are Webhooks?
A Webhook is an event notification sent to a URL of your choice. Users can configure them to trigger events on one site (WooCommerce) to invoke behavior on another (WhatsCloud).
Webhooks are useful for integrating with third-party services and other external APIs that support them, enabling real-time data flow.
➕ Creating a New Webhook
Step 1: Access Creation Form
Click the "+ Create Webhook" button from the main dashboard to open the webhook configuration dialog.
Step 2: Configure Basic Settings
Fill in the required webhook information to define its purpose and security:

Webhook Name *
- Provide a descriptive name for your webhook.
- Example:
"WooCommerce Order Notifications". - Purpose: Helps identify the webhook's function in the dashboard and logs.
Description
- Add a detailed description of the webhook's purpose.
- Example:
"Triggered when a new order is created in WooCommerce and sends status to WhatsApp." - Benefits: Improves webhook management and team documentation.
HTTP Method *
- Select the HTTP method for incoming webhook requests.
- POST: The most common and recommended method for sending webhook data.
Secret Key (Optional)
- Enter a secret key for webhook authentication and security.
- Example:
wc_sec_6545sd547d54s545d455d54s54d5s4d54d5s4d - Purpose: Allows you to verify the webhook authenticity in your destination application and prevent unauthorized requests.
🔐 Security Best Practice
Always use secret keys for production webhooks to ensure secure data transmission and verification.
Step 3: Submit Configuration
Click "Save" to create the webhook with your specified configuration.
Generated Endpoints
Each webhook listener created receives a unique URL in the format:
https://whatscloud.pro/api/webhooks/[webhook_id]Integration Steps
- Copy the Webhook URL from the webhook card in the dashboard.
- Configure your source system (e.g., WooCommerce, Shopify) to send data to this URL when a specific event (like `order.created`) occurs.
- Set up authentication in the source system using the secret key you provided (if applicable).
- Test the integration using the lightning bolt test action provided in the dashboard.
Webhooks in WooCommerce
Webhooks were introduced in WooCommerce 2.2 and can trigger events each time you add, edit or delete:
- Orders 📦
- Products 🛒
- Coupons 🎫
- Customers 👥
It's also possible to use webhooks with WooCommerce actions, e.g., Create a webhook to be used every time a product is added to the shopping cart, using the action woocommerce_add_to_cart.
Creating Webhooks
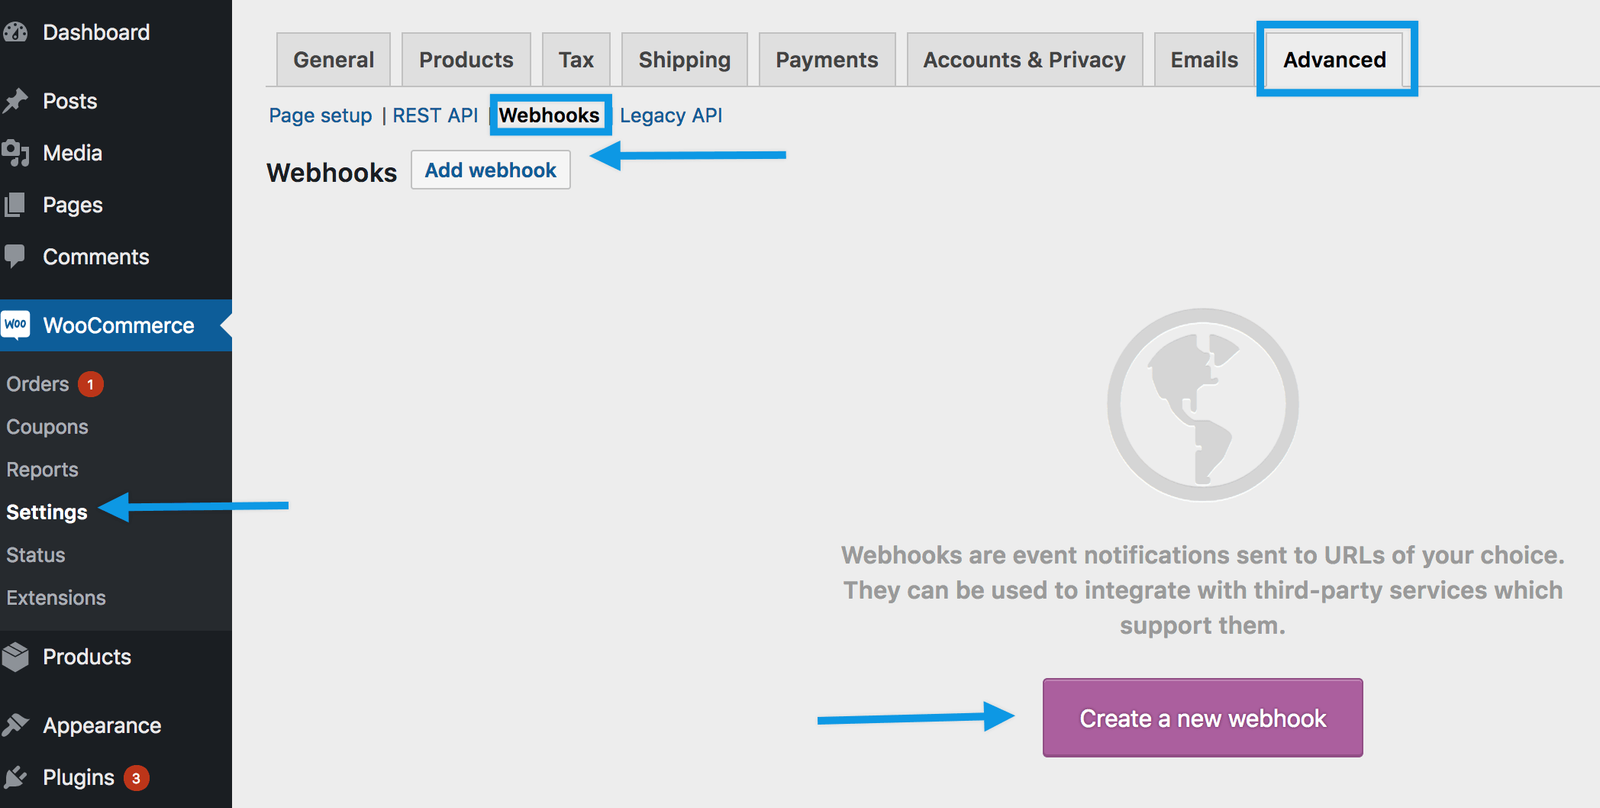
1. Access Webhook Settings
Navigate to: WooCommerce → Settings → Advanced → Webhooks
📍 Location Note
Webhooks were formerly found under WooCommerce → Settings → API prior to WooCommerce 3.4.
2. Create New Webhook
- Select "Create a new webhook" (first time) or "Add webhook"
- The Webhook Data box appears
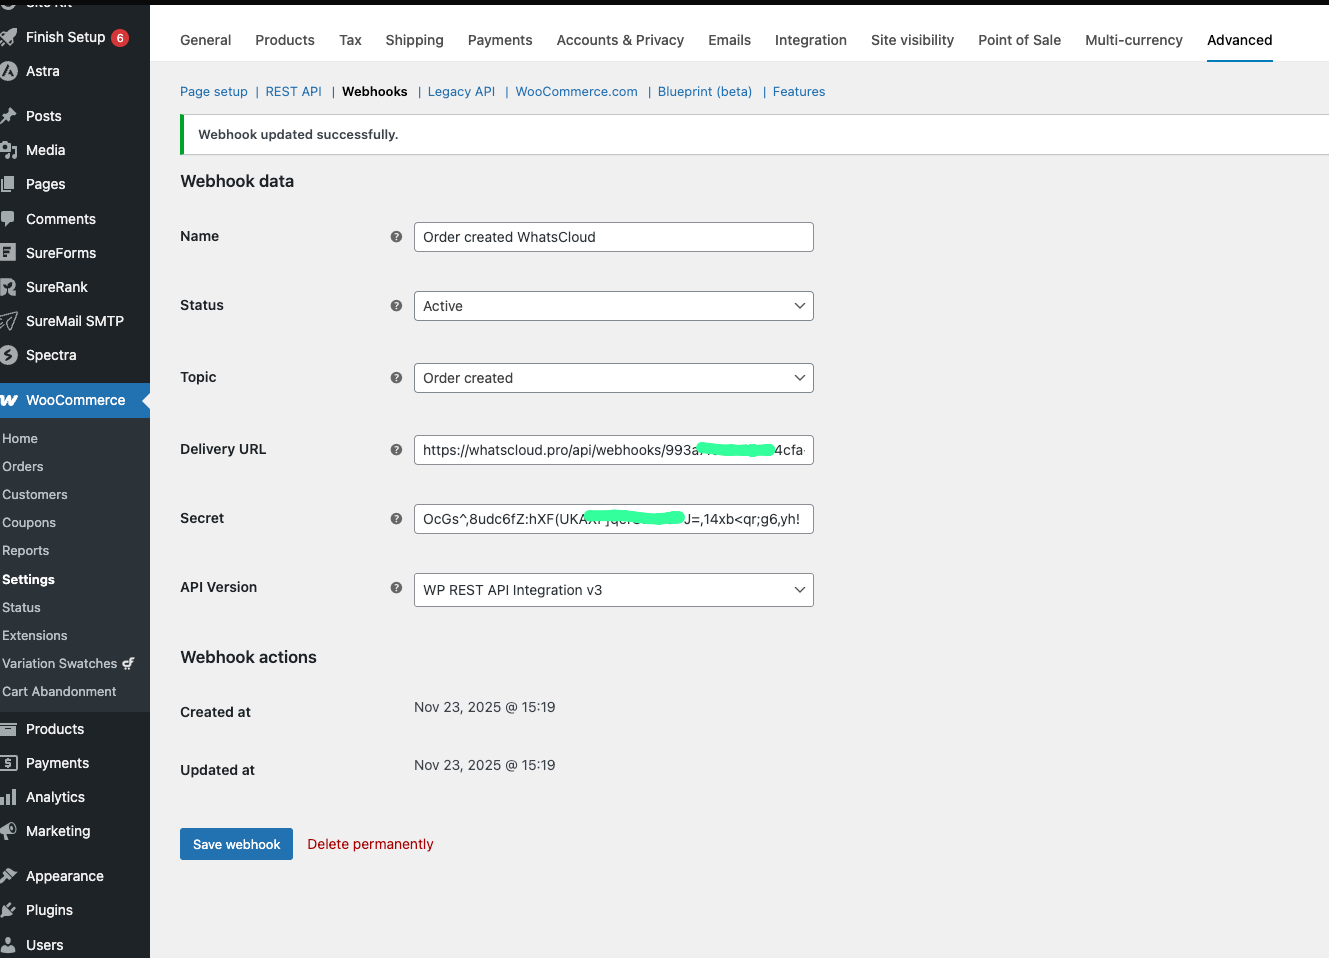
3. Configure Webhook Settings
Name:
- Auto-generated as "Webhook created on [date and time]"
- Change to a descriptive name like "WhatsCloud Order Notifications"
Status:
- Active: Delivers payload ✅
- Paused: Does not deliver ⏸️
- Disabled: Does not deliver due to delivery failures ❌
Topic: Choose when the webhook should trigger:
- Order Created - New orders placed
- Order Updated - Order status changes (Recommended for notifications)
- Order Deleted - Orders removed
- Product Updated - Product changes
- Customer Created - New customer registrations
- Custom Actions - Advanced WooCommerce actions
Delivery URL: Enter your WhatsCloud webhook endpoint:
https://whatscloud.pro/api/webhooks/[webhook_id]4. Save Webhook
Click "Save webhook" to activate
🧪 Testing and Debugging
Webhook Payload Testing
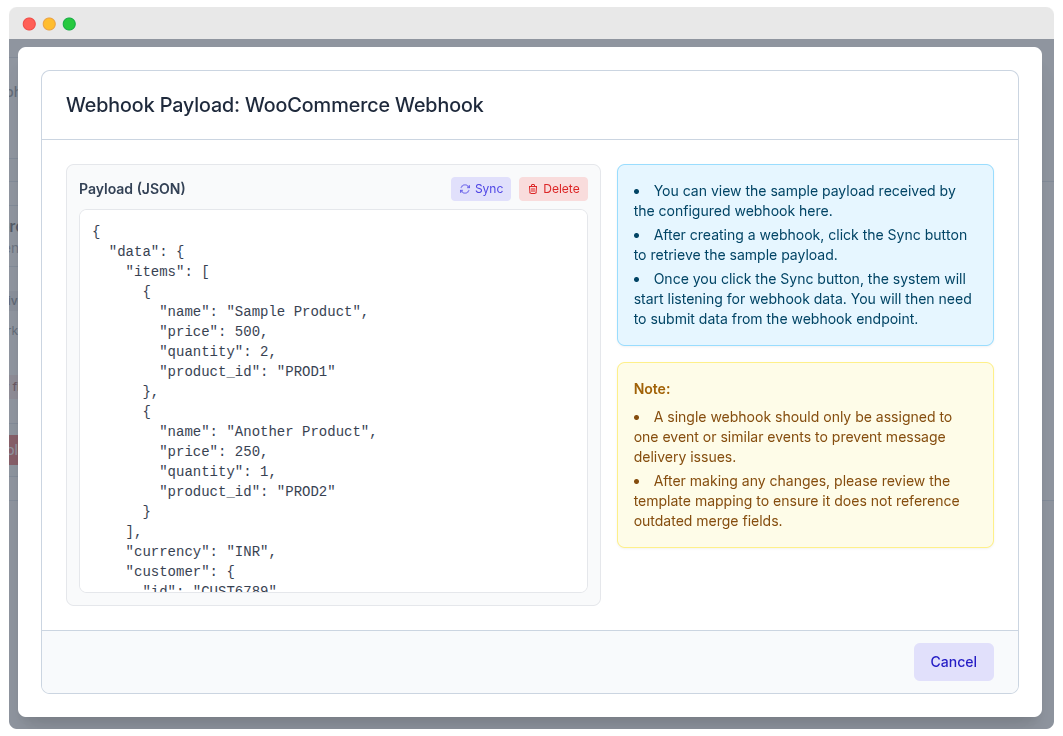
The system provides a payload testing interface to help you verify data structure:
- 📋 JSON Payload Display: View sample webhook data received.
- 🔄 Sync Button: Retrieve real webhook data from the last event.
- 🗑️ Delete Button: Clear test data from the log.
- 💡 Testing Instructions: Step-by-step guidance for sending a test payload.
Testing Process:
- View sample payload received by the configured webhook to understand the expected format.
- Click the Sync button to start listening for incoming data.
- Submit test data from your webhook endpoint (e.g., creating a test order in WooCommerce).
- Verify payload structure and content received in the dashboard to ensure correct mapping for your automations.
🎬 Full Video Preview
⚠️ First Activation
The first time your webhook is saved with Active status, it sends a ping to the Delivery URL to test connectivity.