Facebook Messenger Campaigns
Create and manage broadcast campaigns for Facebook Messenger from Facebook Messenger > Campaigns in the WhatsCloud sidebar.
Important
Once a campaign is sent or being processed, it cannot be edited. You can edit a campaign only before it starts processing.
Campaign List
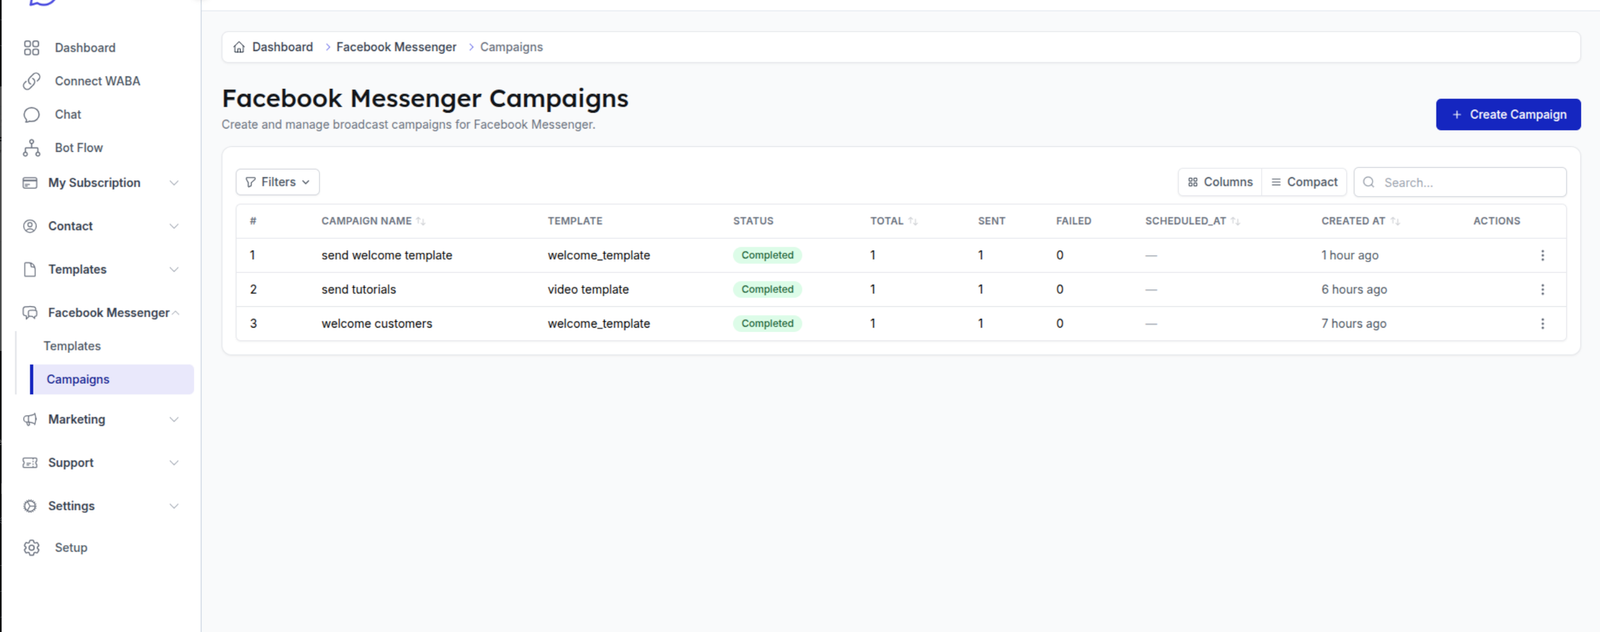
The campaign list displays all Messenger campaigns with status, delivery totals, scheduling details, and available actions.
| Column | Description |
|---|---|
| # | Serial number. |
| Campaign Name | Name of the campaign. |
| Template | Messenger template used in the campaign. |
| Status | Campaign status, such as Completed, Pending, or Processing. |
| Total | Total number of targeted contacts. |
| Sent | Number of messages sent successfully. |
| Failed | Number of messages that failed to send. |
| Scheduled At | Scheduled date and time, or - for immediate sending. |
| Created At | Date and time when the campaign was created. |
| Actions | View details or delete the campaign. |
Creating a New Campaign
Click the + Create Campaign button to start the multi-step campaign creation wizard. Fields marked with * are required.
Step 1: Basic Information
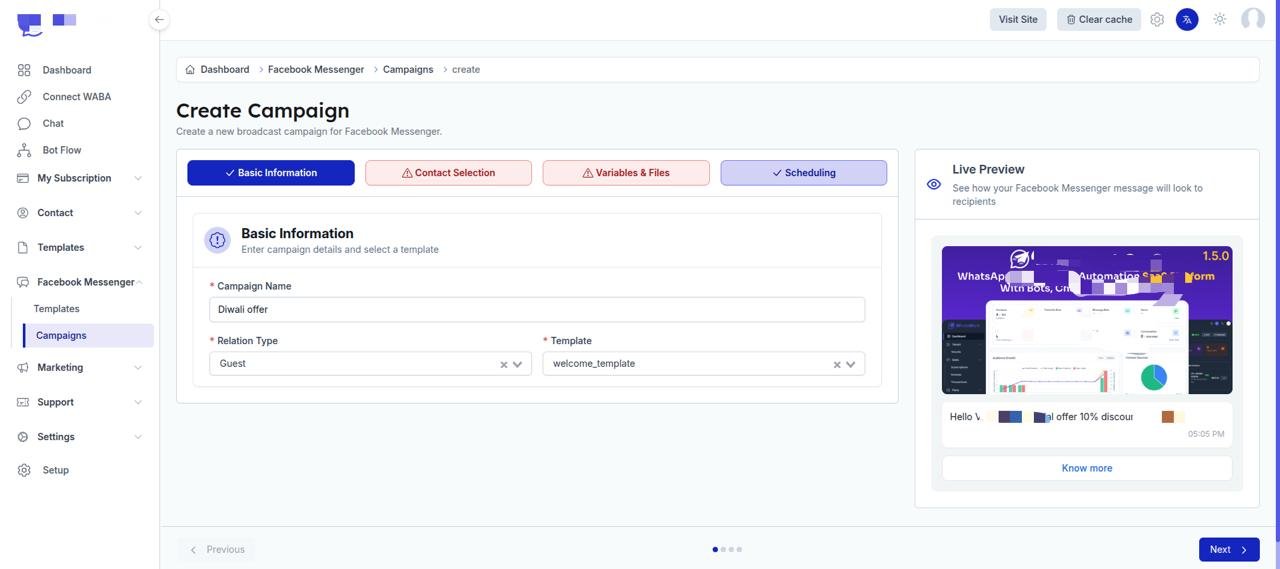
Enter campaign details and select a Messenger template.
| Field | Description |
|---|---|
| Campaign Name * | A name to identify your campaign. |
| Relation Type * | Select the contact relation type to target. |
| Template * | Select a Messenger template to use for this campaign. |
A Live Preview panel shows how your message will look to recipients as you select a template.
Step 2: Contact Selection
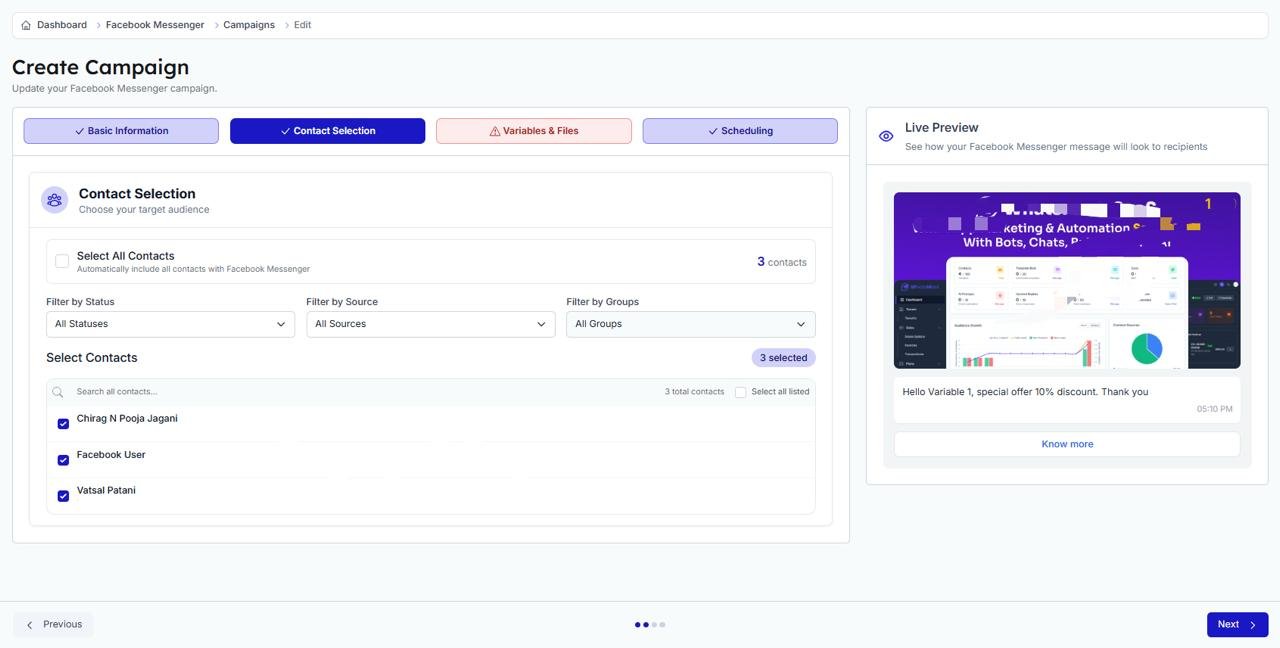
Choose the target audience for your campaign.
- Select All Contacts: Automatically include all contacts with Facebook Messenger details.
- Filter by Status: Filter contacts by their current status.
- Filter by Source: Filter contacts by their source.
- Filter by Groups: Filter contacts by group membership.
- Select Contacts: Manually search and select individual contacts from the list.
Step 3: Variables & Files
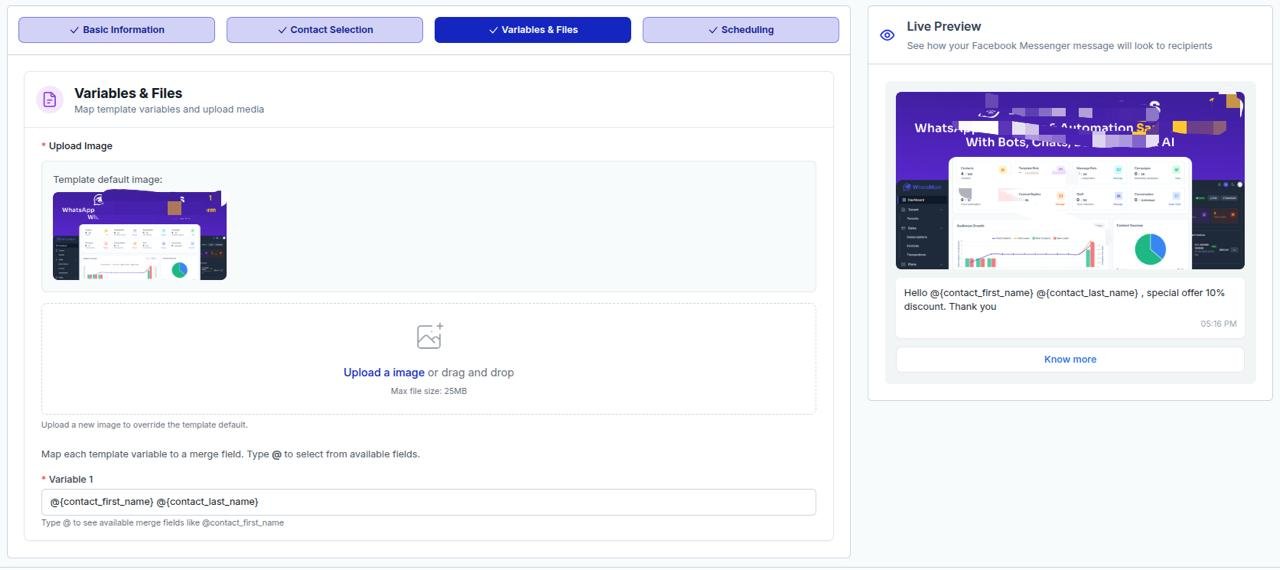
Map template variables and upload media files when required by the selected template.
- Upload Image: If your template uses an Image content type, the default template image is shown. You can upload a new image to override it.
- Variable Mapping: Map each template variable to a merge field. Type
@to select from available fields such as@contact_first_name.
Step 4: Scheduling
Choose when to send your campaign.
| Option | Description |
|---|---|
| Send Immediately | Campaign will start immediately after creation. |
| Schedule for Later | Choose a specific date and time to send. |
If you select Schedule for Later, set the Scheduled Send Time using the date and time picker.
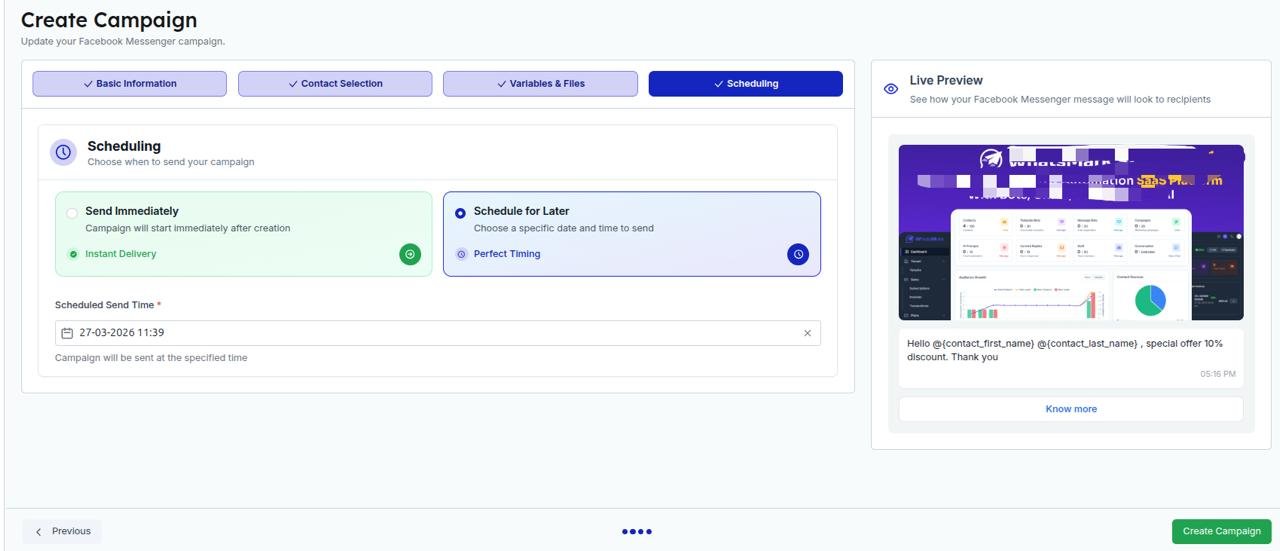
Click Create Campaign to finalize. The campaign will be queued for processing.
Campaign Details
Click View Details from the actions menu on any campaign to see the full campaign report.
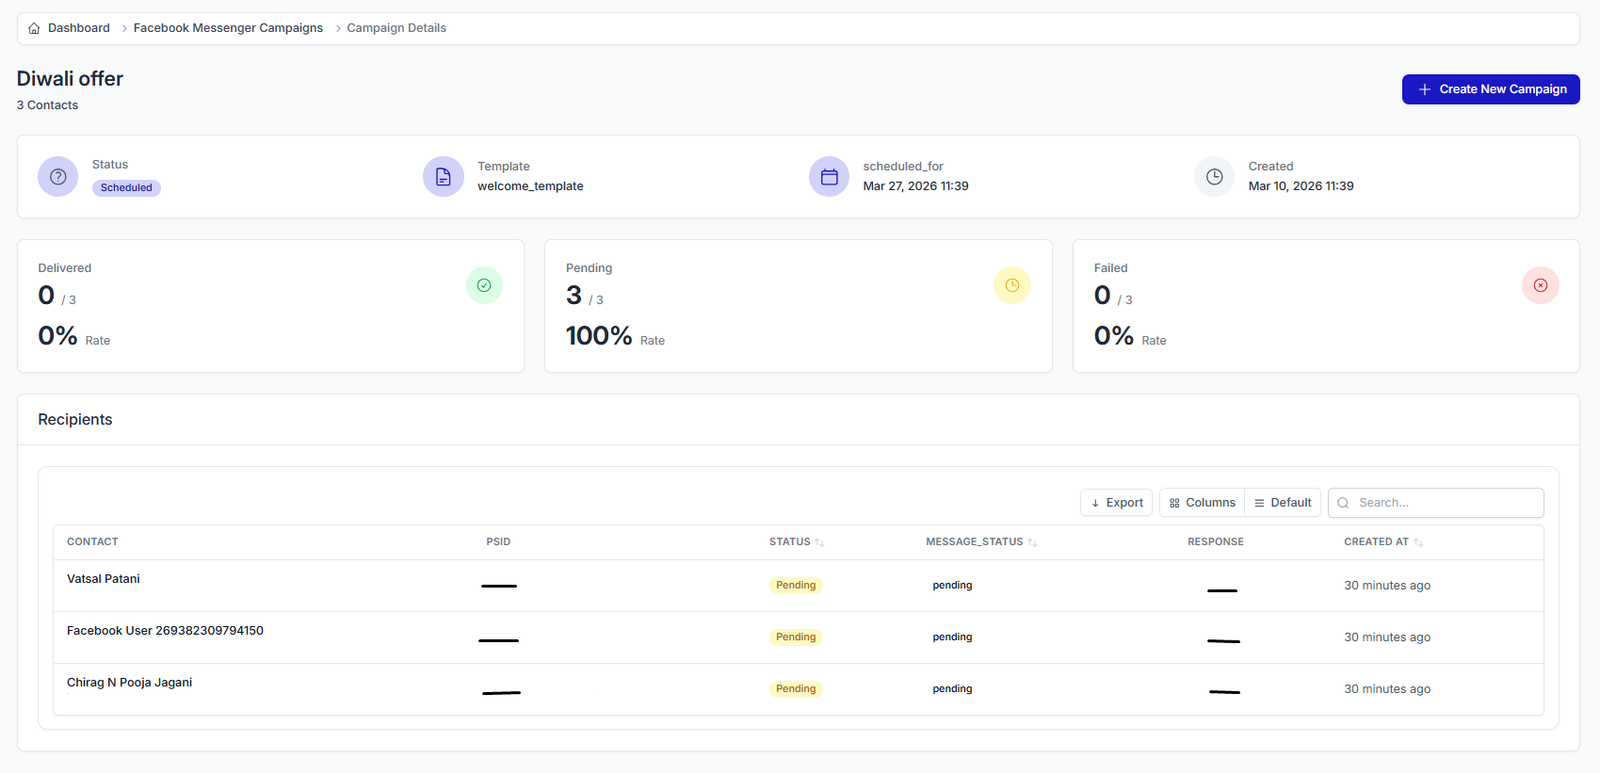
Campaign Overview
The top section shows a summary of the campaign:
| Field | Description |
|---|---|
| Status | Current campaign status, such as Completed. |
| Template | Template used for the campaign. |
| Scheduled For | Immediate or the scheduled date and time. |
| Created | Date and time the campaign was created. |
Delivery Statistics
Three cards display delivery performance:
| Metric | Description |
|---|---|
| Delivered | Number of messages delivered out of the total, including delivery percentage. |
| Pending | Number of messages still pending, including pending percentage. |
| Failed | Number of messages that failed, including failure percentage. |
Recipients
The recipients table shows per-contact delivery details:
| Column | Description |
|---|---|
| Contact | Contact name and PSID. |
| PSID | Facebook Page-Scoped ID of the recipient. |
| Status | Delivery status, such as Sent. |
| Message Status | Message-level status, such as sent. |
| Response | Any response received from the recipient. |
| Created At | Date and time when the message was sent. |
You can Export the recipients list, adjust visible Columns, switch to Compact view, and Search for specific contacts.