Facebook Messenger Settings
Configure your Facebook Messenger integration from Application Settings > Facebook Messenger in the WhatsCloud tenant panel.
Before You Start
If you have not created a Meta Developer App yet, Create Meta Developer Account & App first, then return here to connect your Facebook Page with WhatsCloud.
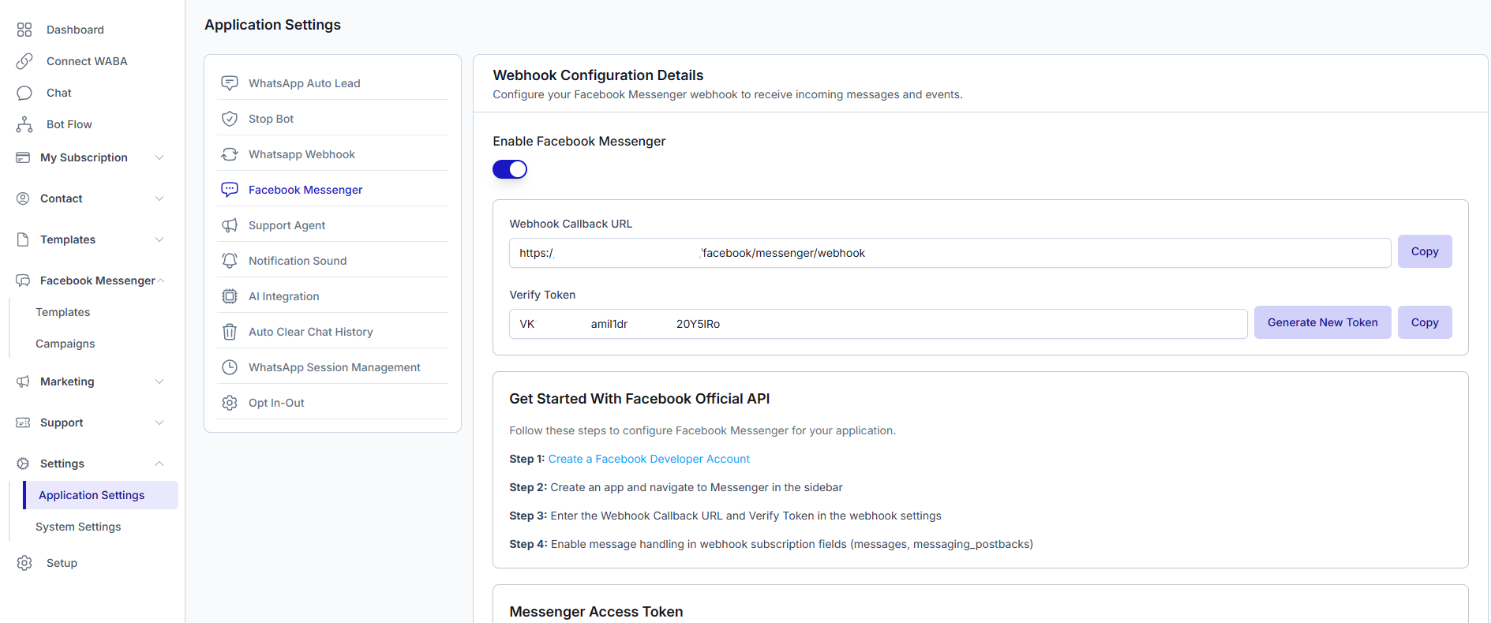
Step 1: Enable Facebook Messenger
- Navigate to Application Settings from the sidebar.
- Click on Facebook Messenger.
- Toggle Enable Facebook Messenger to ON.
Step 2: Configure Webhook in Meta App
Once enabled, WhatsCloud will display your Webhook Configuration Details.
| Field | Description |
|---|---|
| Webhook Callback URL | Your unique webhook URL for receiving Messenger events. |
| Verify Token | A token used by Meta to verify your webhook endpoint. |
- Click Copy next to the Webhook Callback URL.
- Click Copy next to the Verify Token, or click Generate New Token to create a new one.
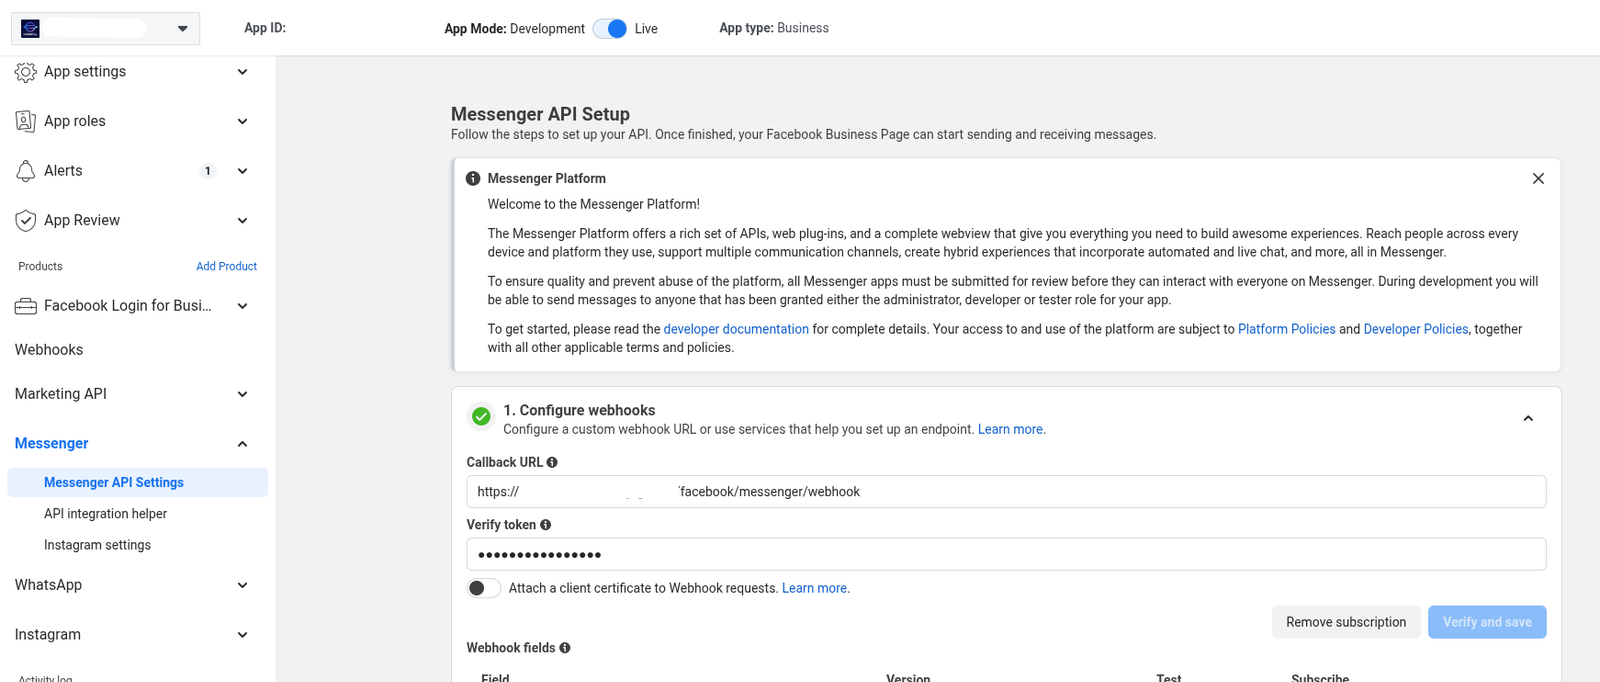
Add Webhook in Meta Developer Dashboard
- Open your Meta App at developers.facebook.com.
- In the left sidebar, navigate to Messenger > Messenger API Settings.
- Under 1. Configure webhooks, paste the callback URL and verify token copied from WhatsCloud.
- Click Verify and save.
Subscribe to Webhook Fields
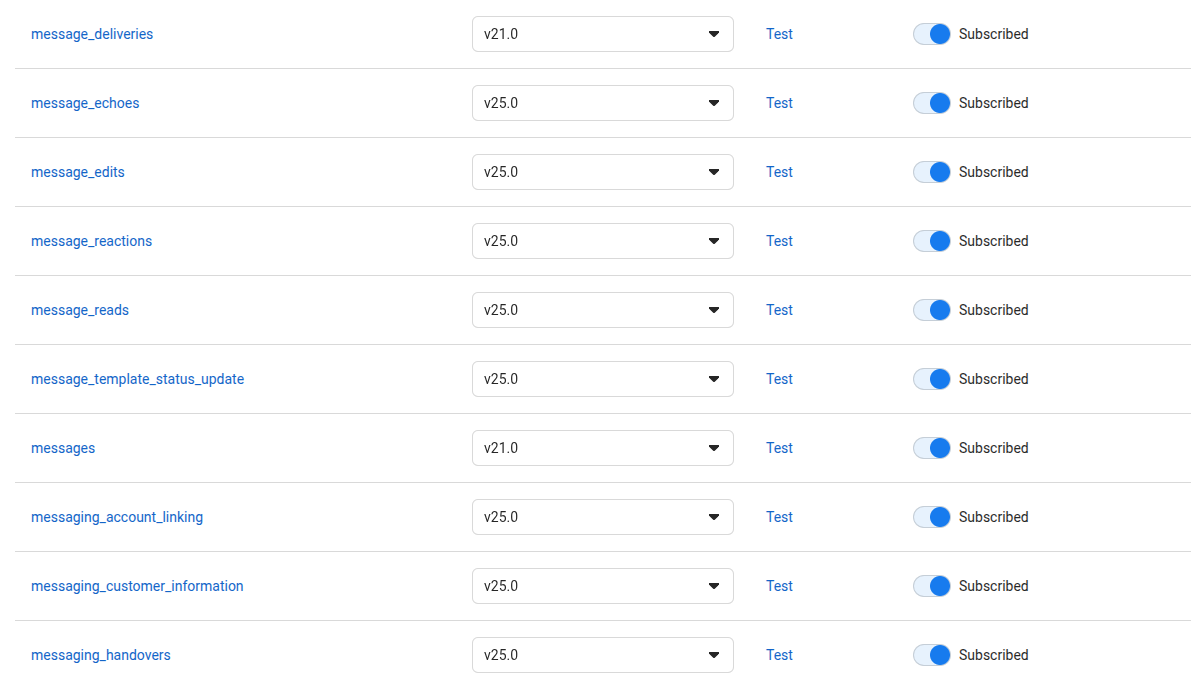
After verifying the webhook, subscribe to the webhook fields required for Messenger communication.
| Webhook Field | Purpose |
|---|---|
messages |
Receive incoming messages sent to your Facebook Page. |
messaging_postbacks |
Receive button click and postback events. |
messaging_optins |
Receive opt-in events from Messenger users. |
messaging_optouts |
Receive opt-out events from Messenger users. |
message_reads |
Receive read receipt events. |
message_echoes |
Receive echo events for messages sent by your Page. |
message_deliveries |
Receive message delivery confirmations. |
messaging_referrals |
Receive referral events. |
Step 3: Generate Access Token & Connect Page
- In your Meta App dashboard, go to Messenger > Messenger API Settings.
- Under 2. Generate access tokens, find your Facebook Page and click Add Page if it is not already added.
- Select the Page you want to connect with WhatsCloud.
- Set up the webhook subscription fields for the Page, including
messages,messaging_postbacks,messaging_optins,messaging_optouts,message_reads, andmessage_echoes. - Click the Generate button next to your Page.
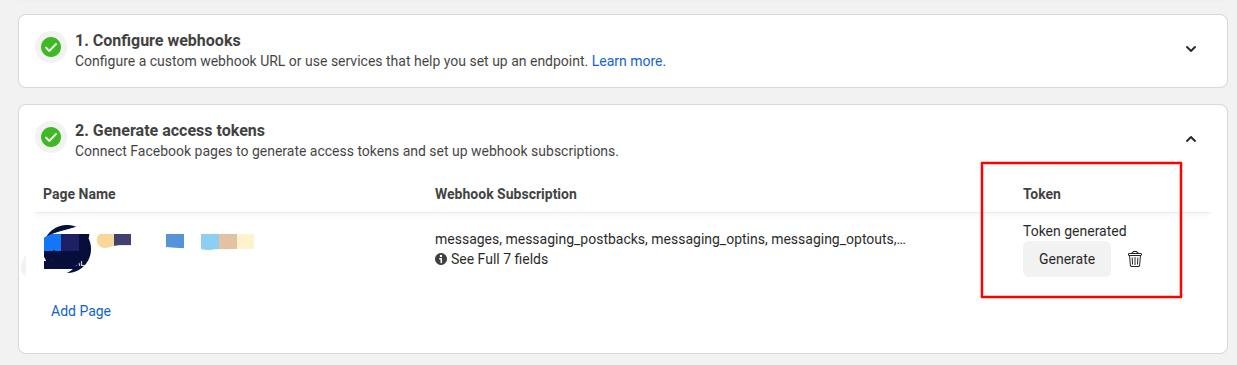
Copy the Token
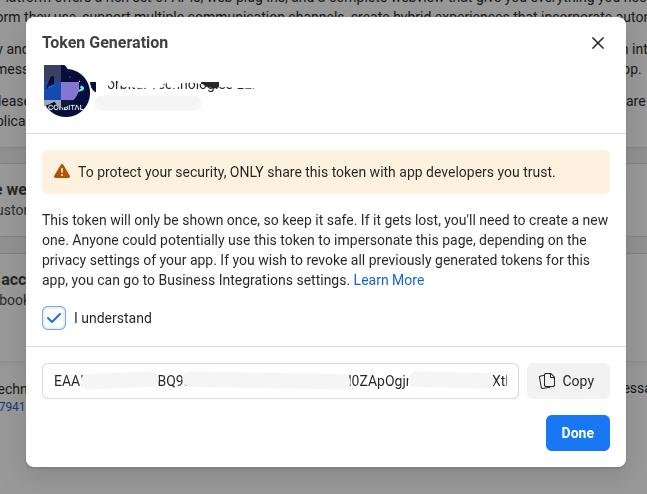
- A Token Generation modal will appear with your Page access token.
- Check I understand to acknowledge the security notice.
- Click Copy to copy the token.
Warning
This token is shown only once. Keep it safe. If it is lost, you will need to generate a new one.
Step 4: Enter Credentials in WhatsCloud
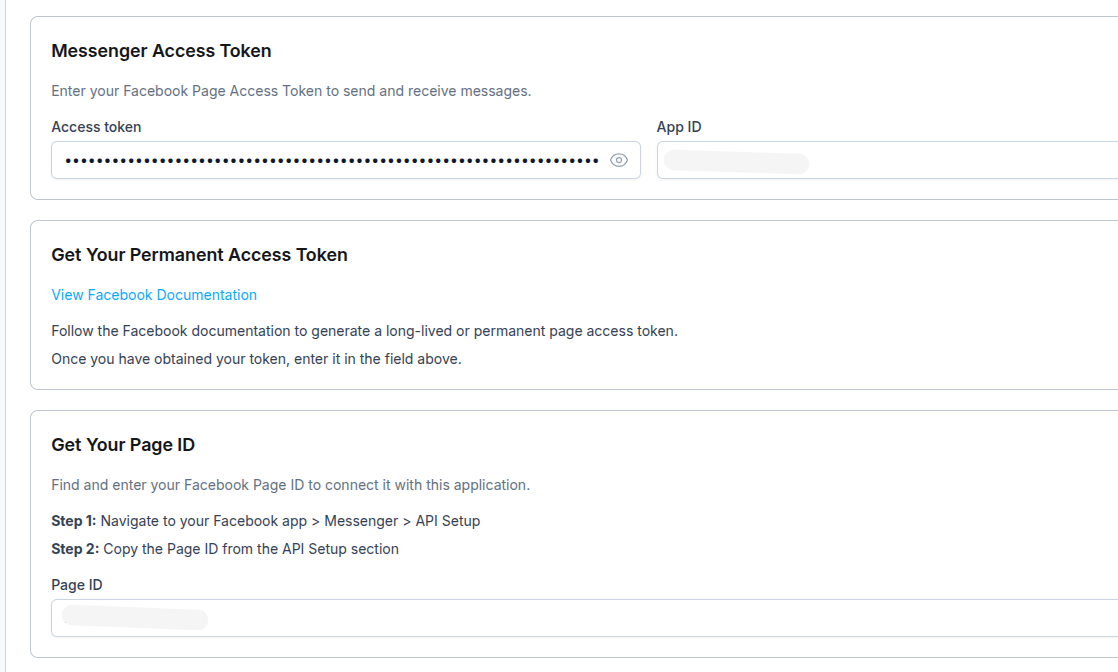
Go back to your WhatsCloud Application Settings > Facebook Messenger page and fill in the required credentials.
| Field | Description |
|---|---|
| Access Token | The token copied from the Token Generation modal in step 3. |
| App ID | Found at the top of your Meta App dashboard. |
| Page ID | The Page ID shown under your Page name in Messenger API Settings. |
How to Find Your Page ID
- In your Meta App, navigate to Messenger > API Setup.
- The Page ID is displayed under your Page name in the Generate access tokens section.
Step 5: Save Changes
- After entering the Access Token, App ID, and Page ID, click Save Changes.
- Your Facebook Messenger integration is now active.
Production Use
Make sure your Meta App is set to Live mode, not Development mode, before using Facebook Messenger in production.
What Happens After Configuration
Once settings are configured correctly, WhatsCloud can receive new messages from your business Facebook Page's Messenger for the Page ID and access token you configured.
You can then:
- Receive and reply to Facebook Messenger messages from WhatsCloud.
- Use Messenger templates and campaigns where available in your tenant panel.
Current Availability
Currently, message sending and receiving functionality is available for Facebook Messenger in WhatsCloud. Additional Messenger automation features can be added in future updates.